> ## Documentation Index
> Fetch the complete documentation index at: https://docs-staging-actions-triggers-prototype.mintlify.site/llms.txt
> Use this file to discover all available pages before exploring further.
> Documentation for integrating Auth0 into Netlify
# Integrate with Netlify
## Overview
Connect a new or existing Auth0 instance to your Netlify project to enhance your app's security, scalability, and customization using the Auth0 Integration. This integration allows you to implement a streamlined customer identity approach directly in your application.
Use the new integration to build and customize the identity flow for your Netlify project. To get your app up and running quickly and securely, this integration:
* Sets up a production environment in Netlify that integrates with your Auth0 tenant in just a few clicks.
* Automatically creates an Application in your Auth0 tenant that connects with your Netlify project.
* Pre-loads your Auth0 credentials into Netlify, allowing you to skip some of the manual steps in this process.
## Prerequisites
To begin integrating Auth0 into your Netlify project, there are a few requirements that you'll need to set up before getting started:
* A Netlify account with a project that you would like to integrate with. Visit [Create your Netlify account](https://www.netlify.com/) to create an account.
* A web application that requires authentication, such as a React, Vue, or static site with serverless functions.
## Add a Netlify integration
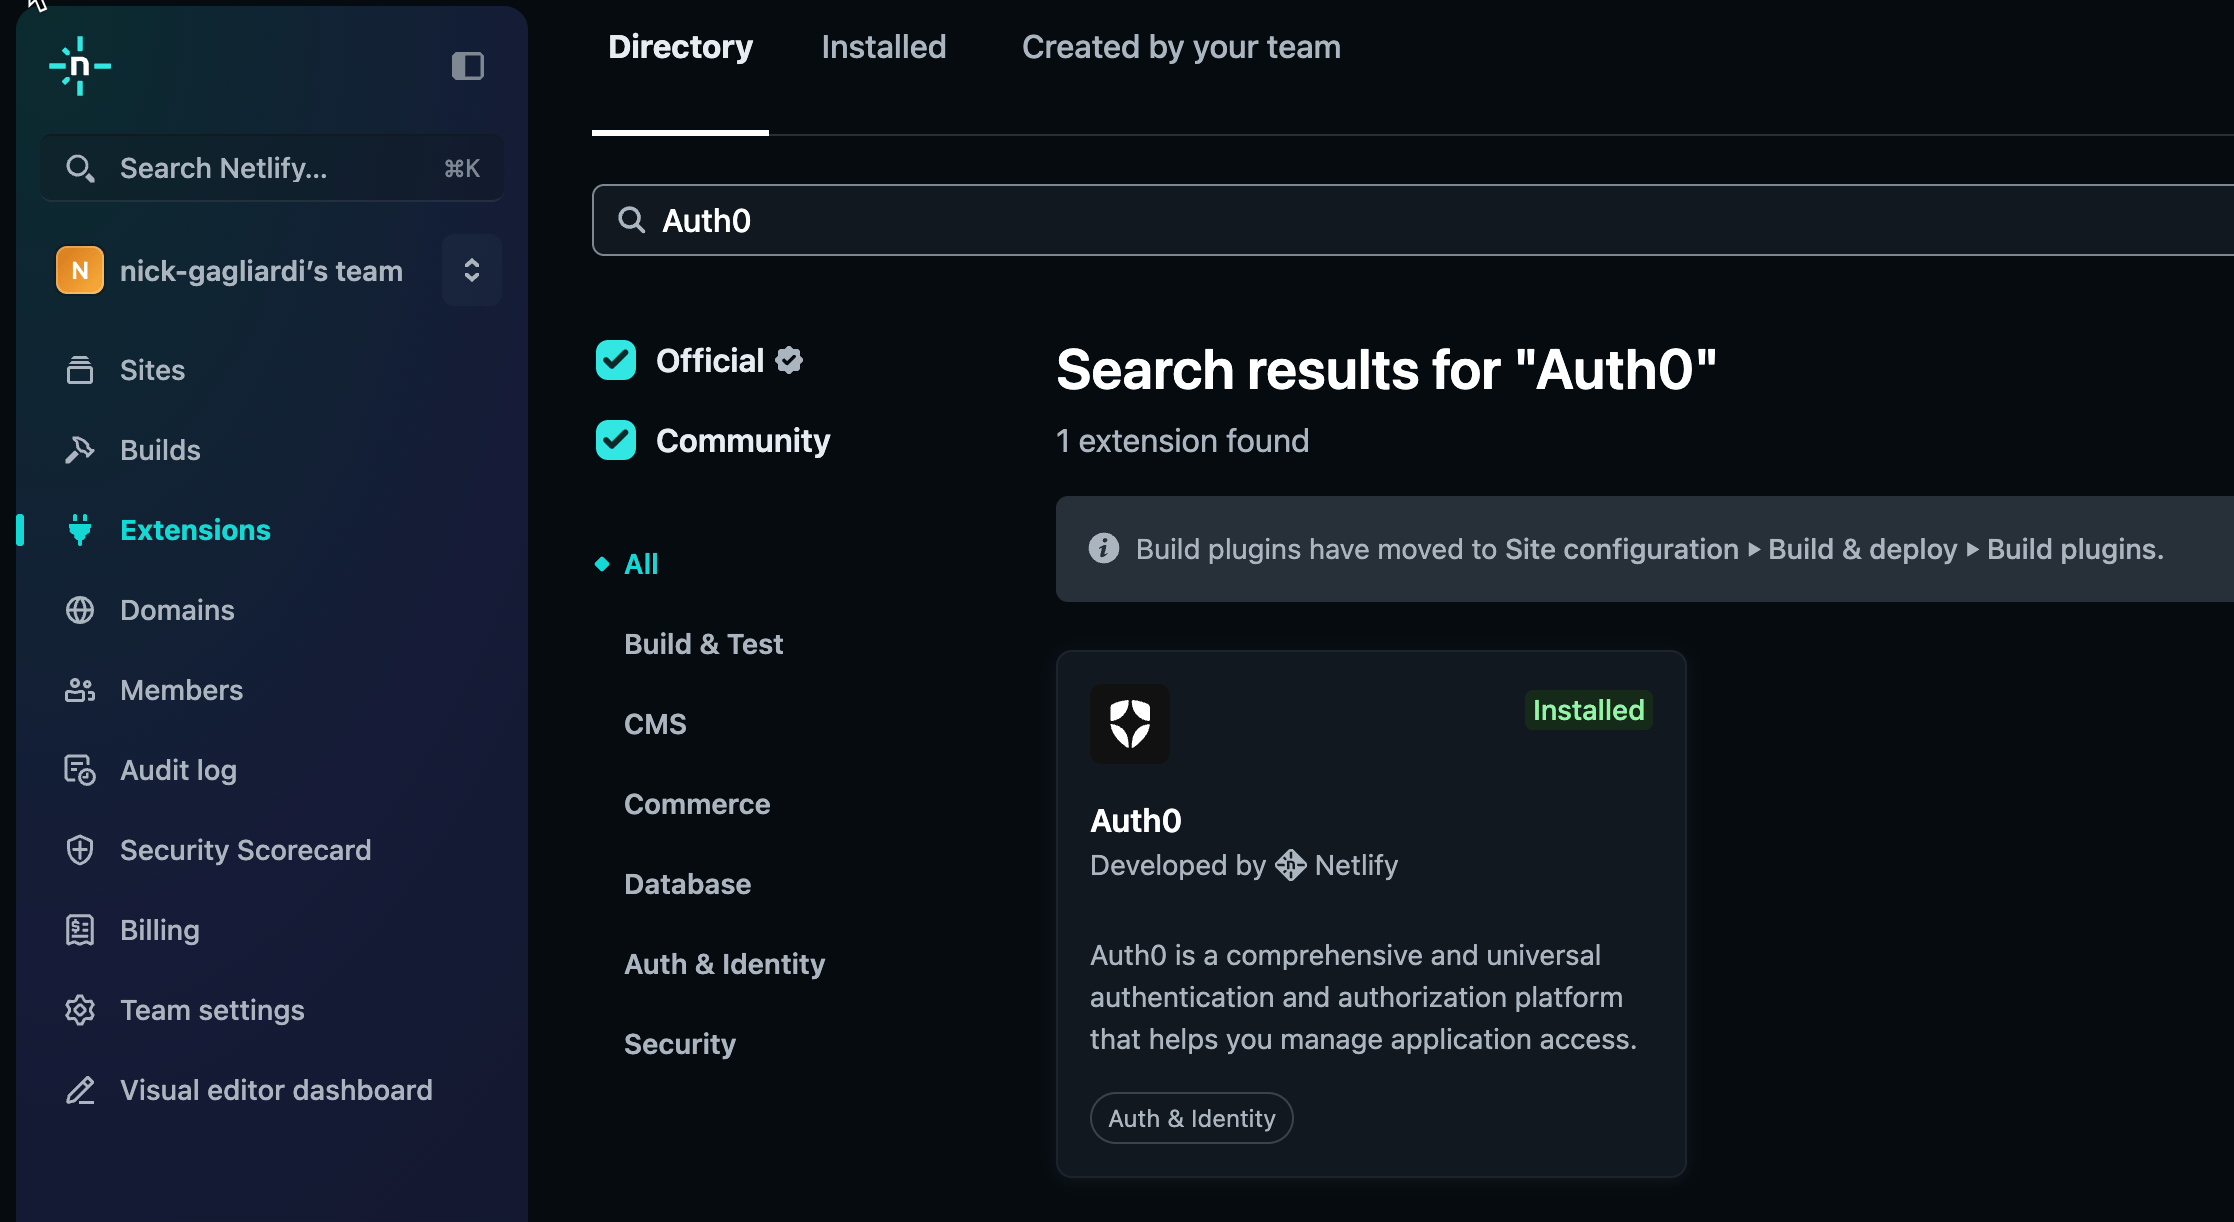
After creating your Netlify account and logging in to your dashboard, you can begin the process of adding an integration. To add the Auth0 integration to an existing Netlify project:
1. From the Netlify dashboard, navigate to **Extensions > Directory.**
2. Search for [**Auth0**](https://app.netlify.com/extensions/auth0)and select **Install.**
3. Select **Install** to proceed with the installation to your Auth0 integration portal.
 ## Connect your site
To connect your site to Auth0:
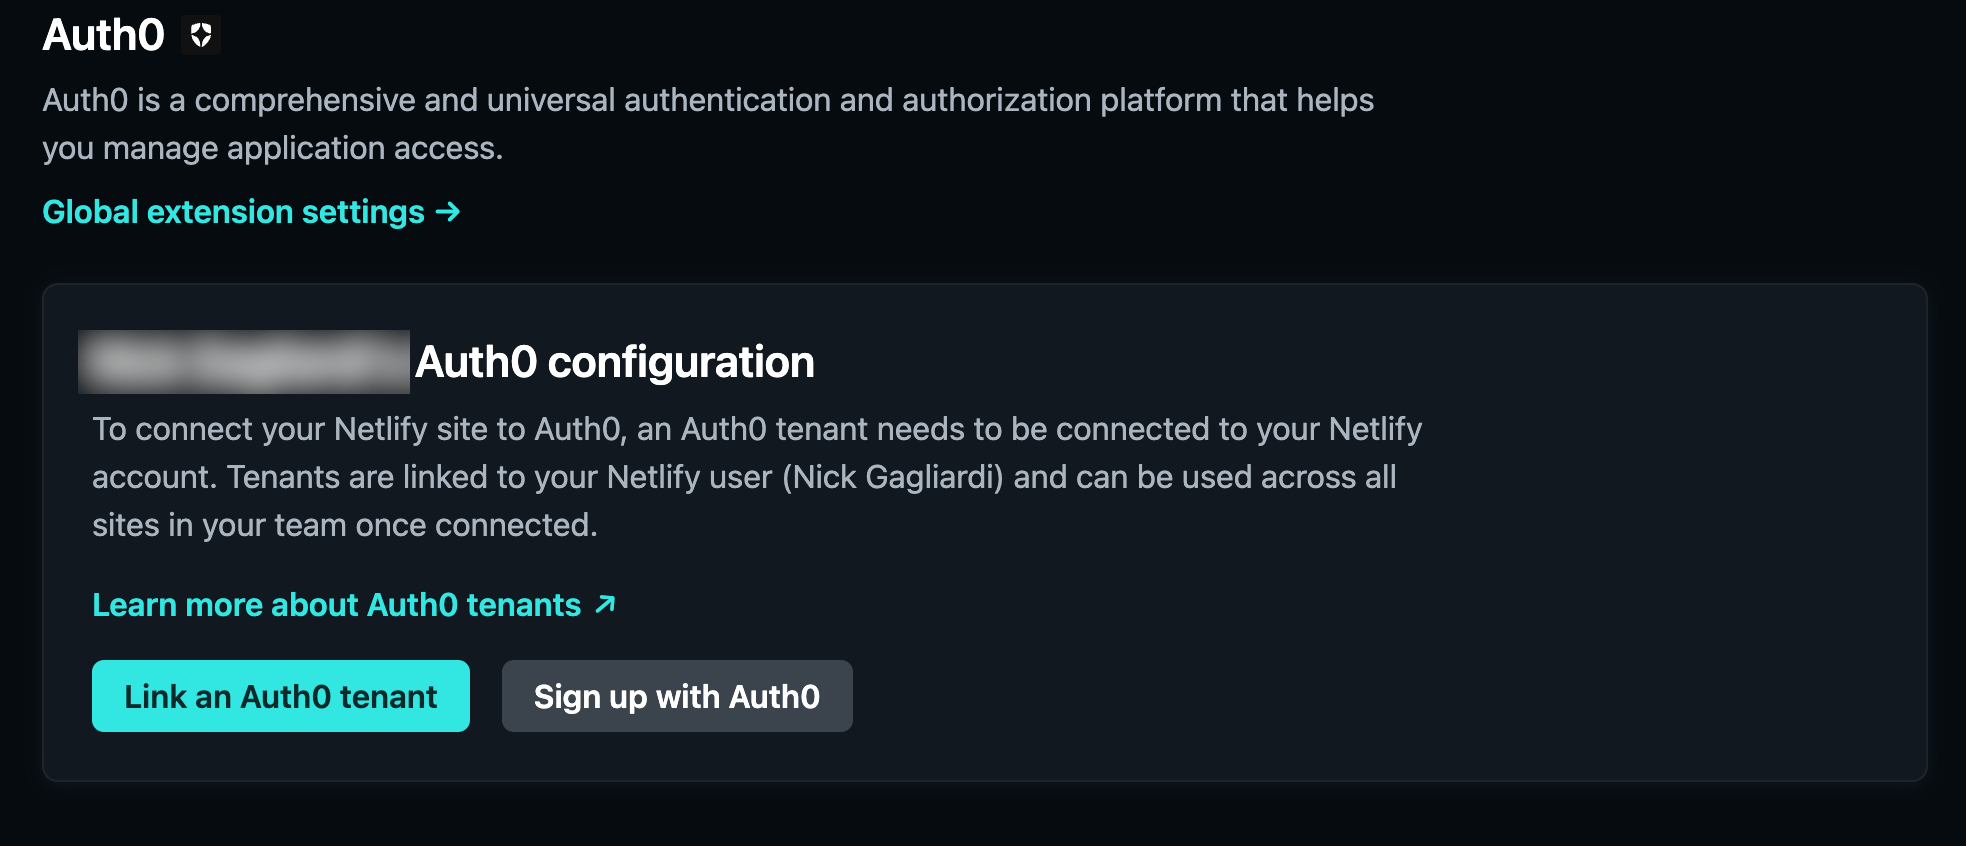
1. Navigate to the **Site Configuration** for the site you want to connect to Auth0.
2. In the sidebar, select **Auth0** under **Access & security.**
3. Select **Link an Auth0 tenant** and follow the prompts to connect to your Auth0 account. If you don't already have an Auth0 account, you can sign up at [https://auth0.com/signup](https://auth0.com/signup).
## Connect your site
To connect your site to Auth0:
1. Navigate to the **Site Configuration** for the site you want to connect to Auth0.
2. In the sidebar, select **Auth0** under **Access & security.**
3. Select **Link an Auth0 tenant** and follow the prompts to connect to your Auth0 account. If you don't already have an Auth0 account, you can sign up at [https://auth0.com/signup](https://auth0.com/signup).
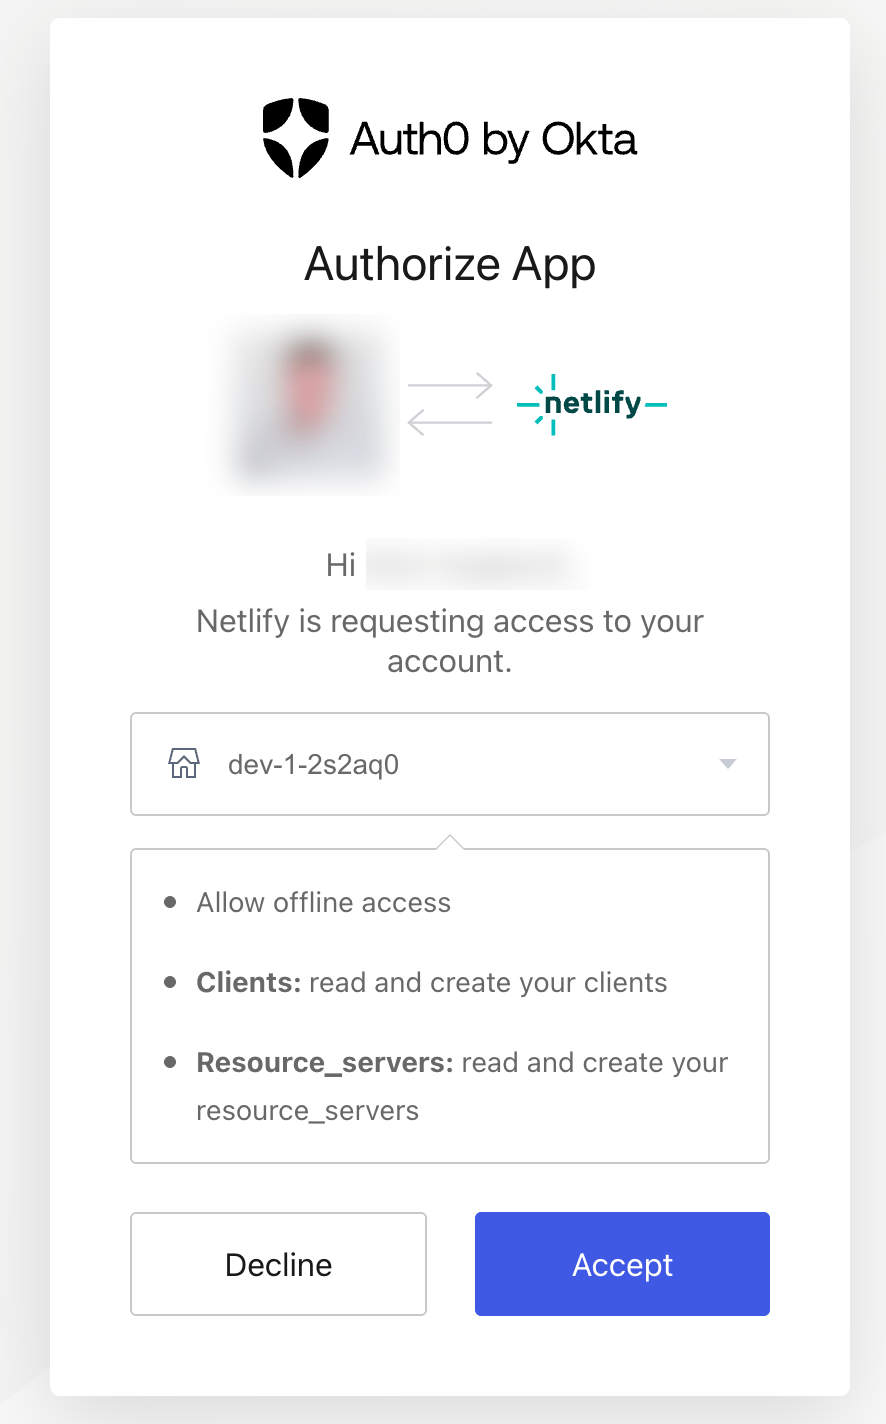 4. Select your tenant from the dropdown list, and select **Accept** to authorize your account.
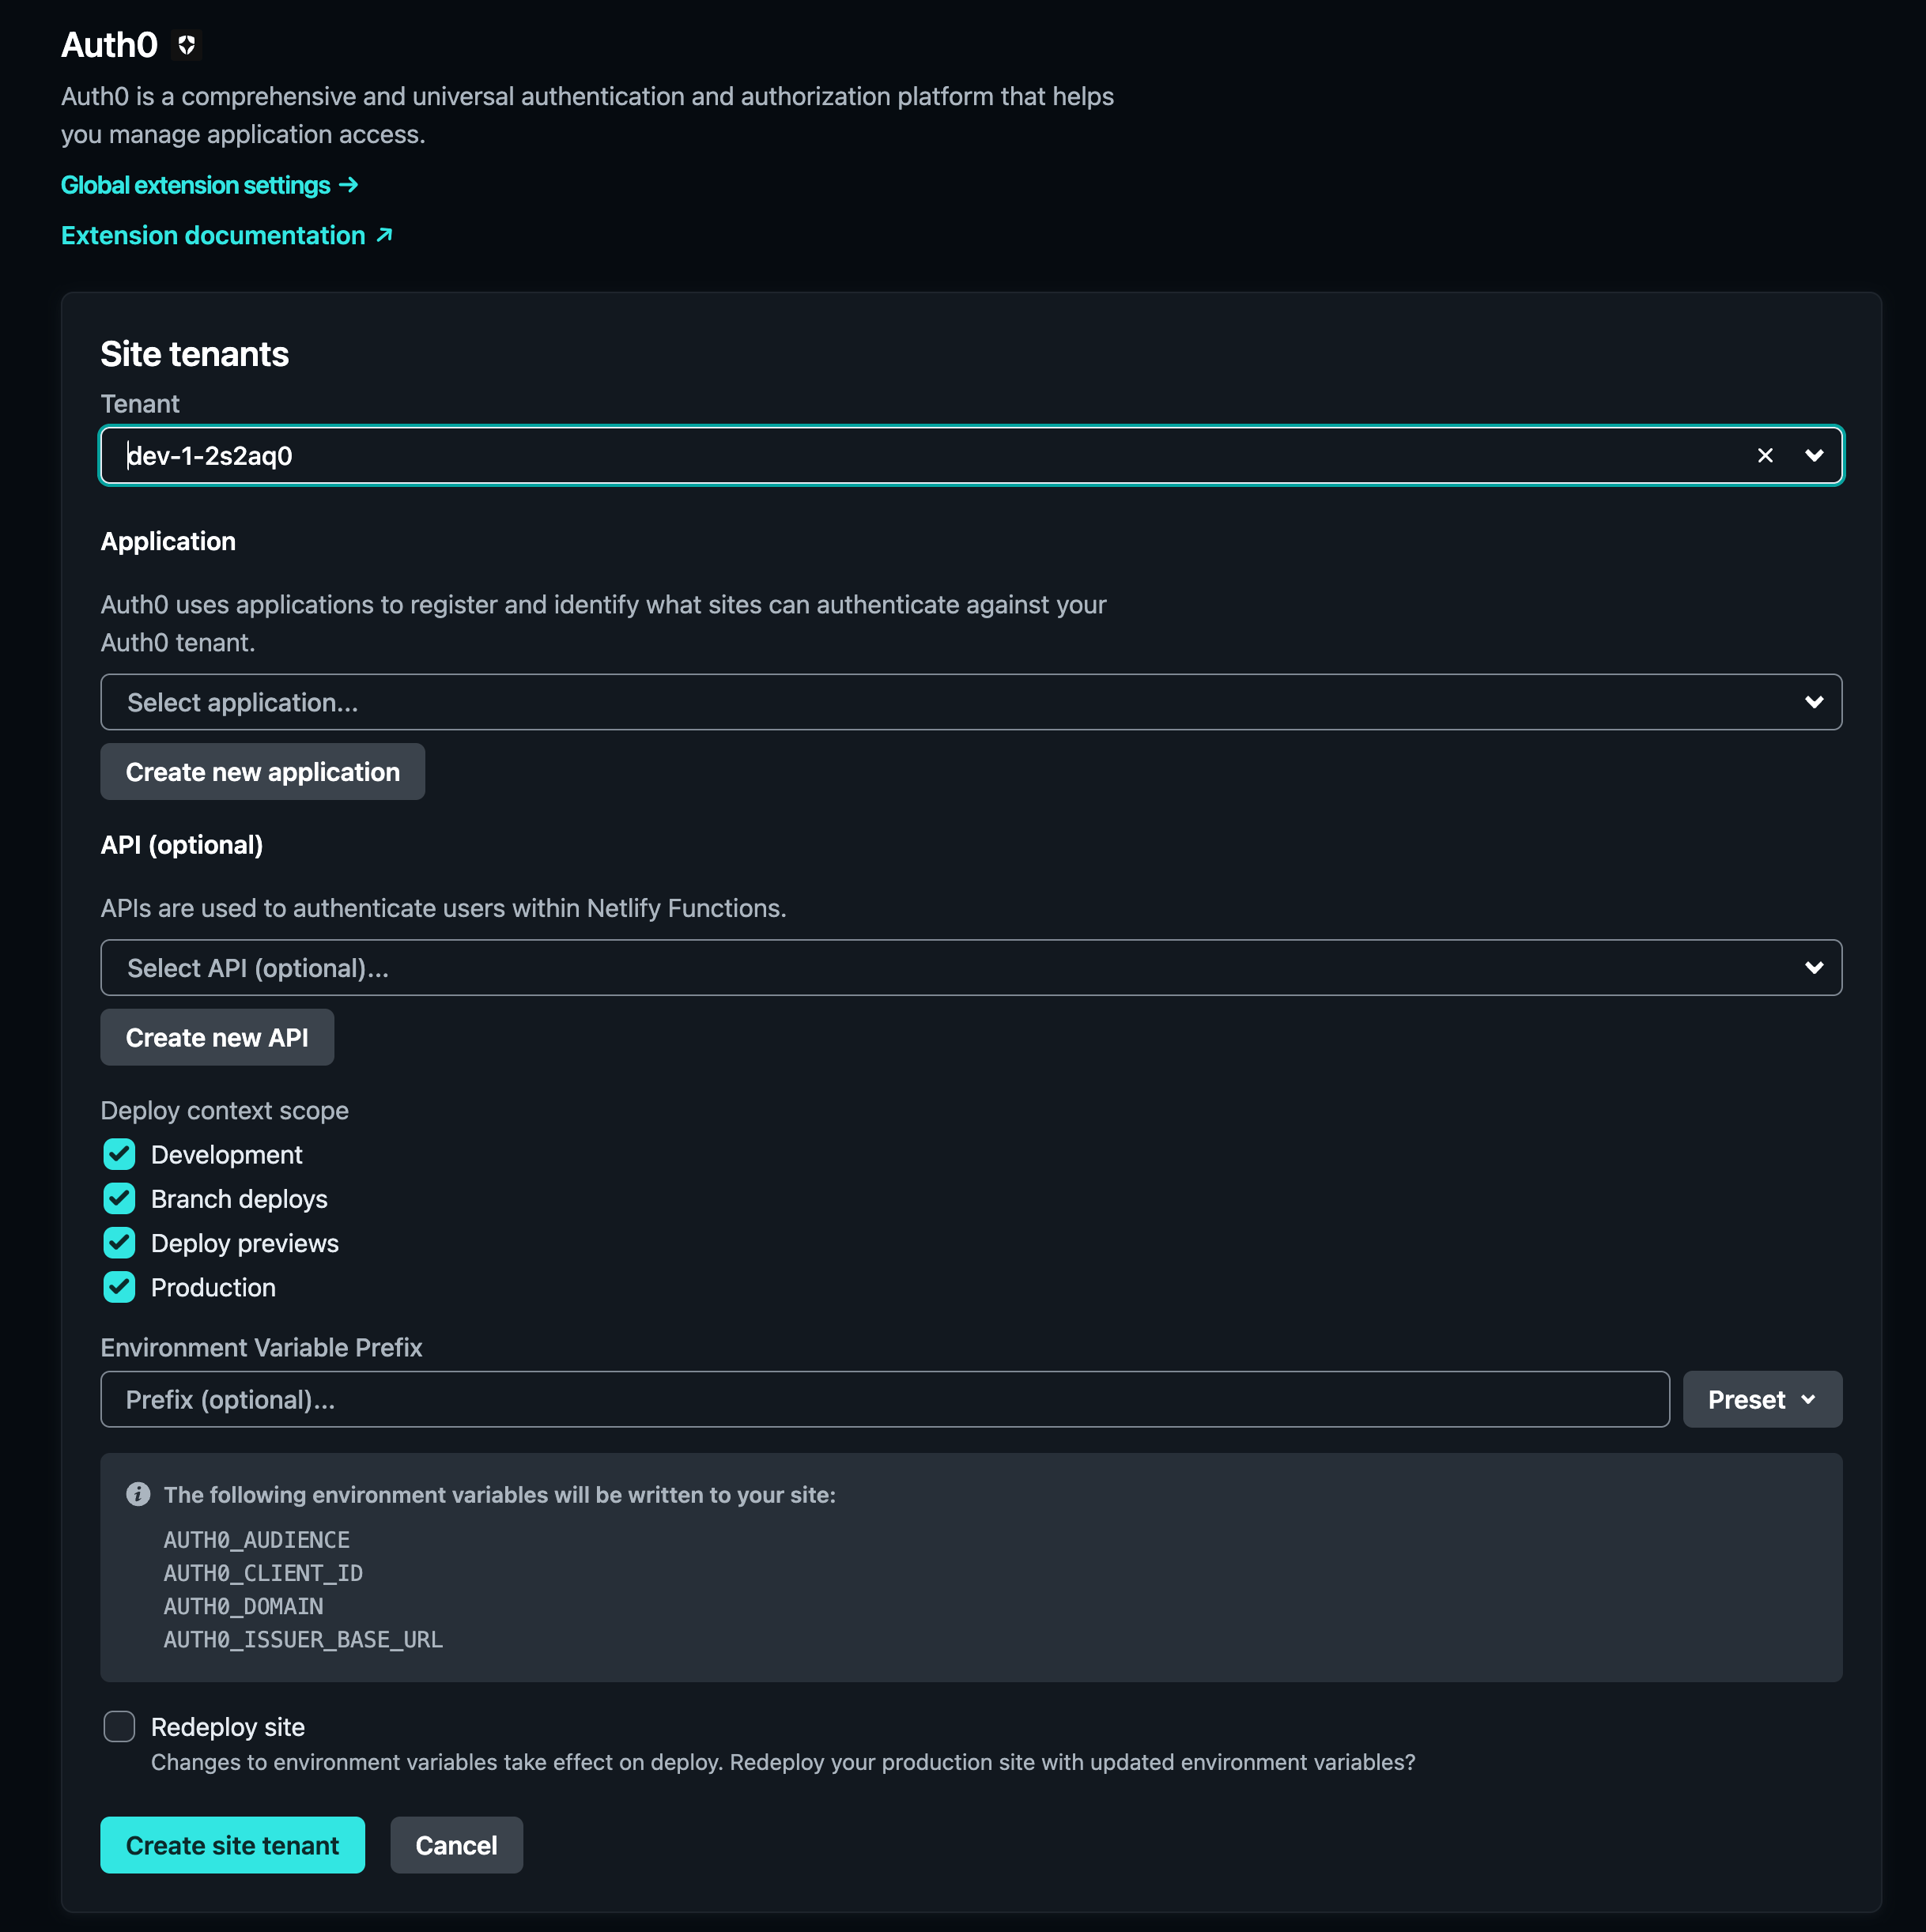
 5. After you have linked your tenant, select **Add tenant**.
6. Fill out the required information for your tenant and application, enable the **Redeploy site** checkbox and select **Create site tenant**.
5. After you have linked your tenant, select **Add tenant**.
6. Fill out the required information for your tenant and application, enable the **Redeploy site** checkbox and select **Create site tenant**.
 7. You should now see the successfully linked site tenant in your site configuration.
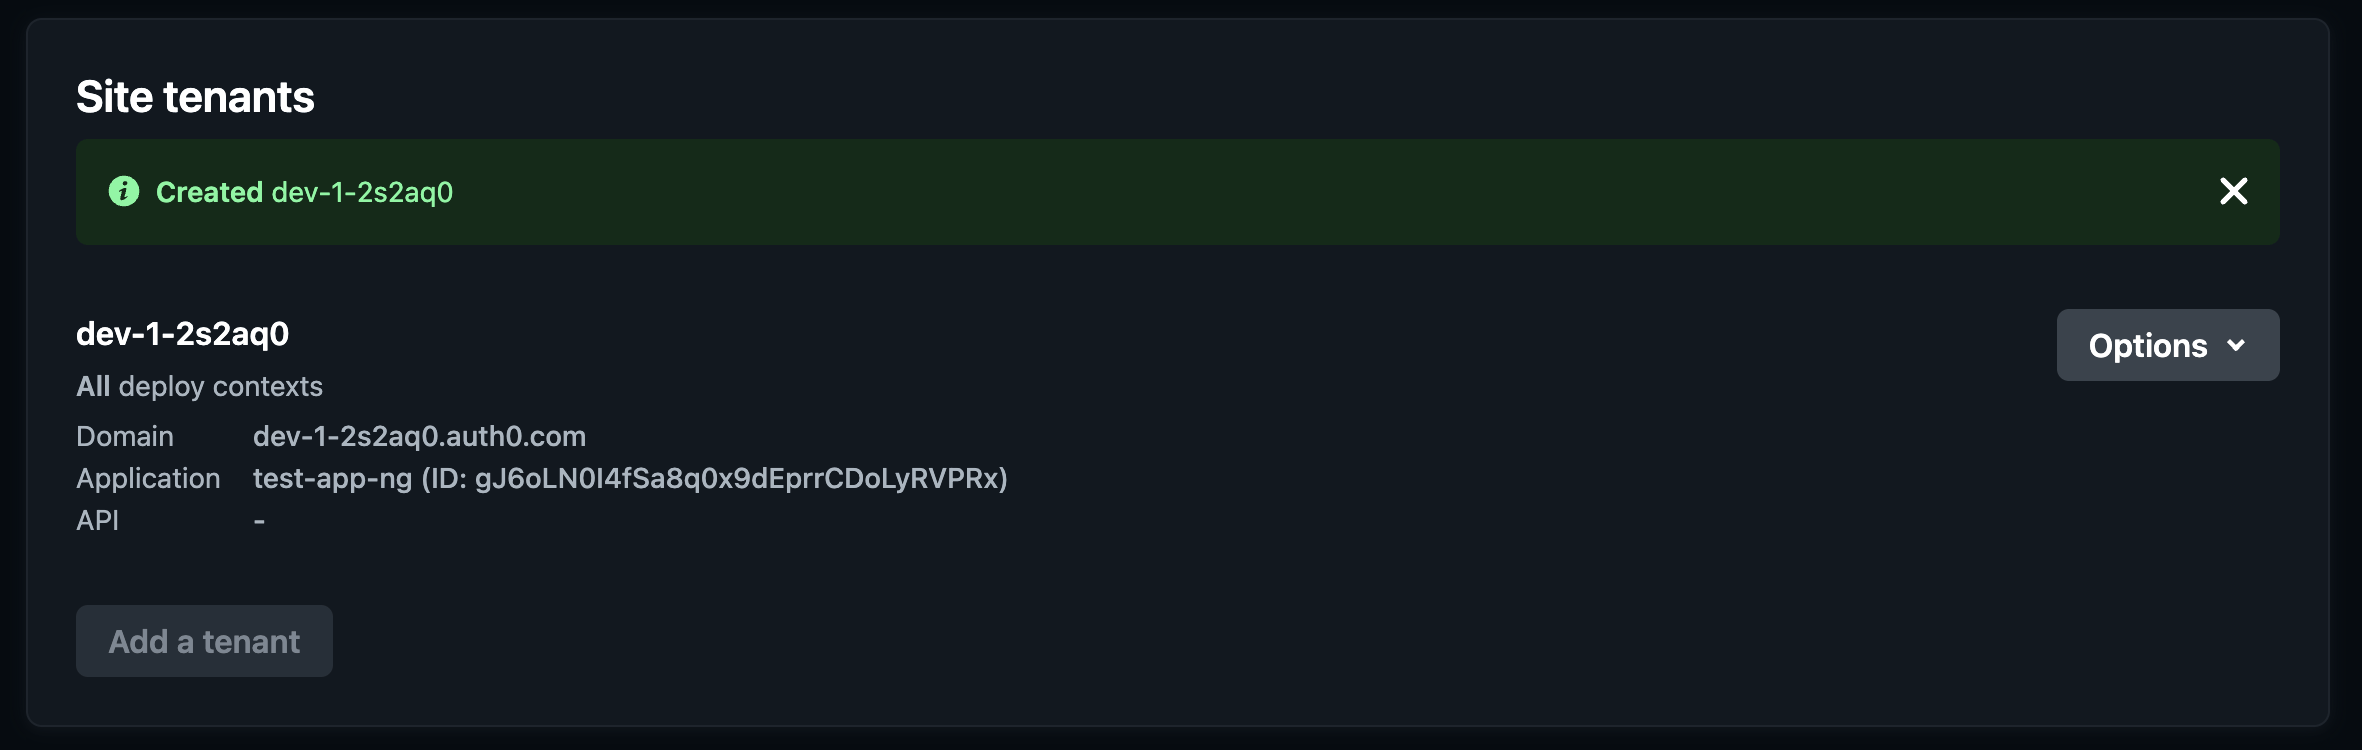 You should now see your client application and API in your Auth0 dashboard under **Applications**.
## Set up the integration
When integrating Auth0 with your Netlify project, you'll need to provide your application with authentication settings such as the **Client ID** and **Auth0 domain**.
If your application is reading these settings from environment variables, they are injected automatically by extension.
1. Go to your Netlify dashboard.
2. Navigate to **Site configuration > Environment variables.**
3. Click **Add a variable**, and enter:
* `AUTH0_CLIENT_ID` (your Auth0 Client ID)
* `AUTH0_DOMAIN` (your Auth0 domain)
These variables, along with all other application information, can be found in your Auth0 dashboard under **Applications > \[Your app] > Settings**.
You should now have the proper Auth0 credentials set up for deployment.
### Populate a configuration file
If your application reads Auth0 settings from a file, you can automate this process during the build phase. This ensures your application always has the proper authorization without manually modifying files.
To do this:
1. Go to your Netlify dashboard.
2. Navigate to **Site configuration > Build & deploy > Build settings**.
3. Modify the **Build command** to include a shell script before starting the build:
```bash wrap lines theme={null}
echo "{\"clientId\": \"${AUTH0_CLIENT_ID}\", \"domain\": \"${AUTH0_DOMAIN}\"}" > auth_config.json && npm run build
```
This script creates a JSON file named `auth_config.json`, and populates it with the environment variables `AUTH0_CLIENT_ID` and `AUTH0_DOMAIN` set above, ensuring the application has correct Auth0 settings at runtime.
## Manage integration
After adding the Auth0 integration to your Netlify project, the Auth0 Dashboard creates a new Application to manage and customize your CIAM workflow.
1. Navigate to the Auth0 Dashboard.
2. Select **Applications > Applications > \[Your Netlify application]**
3. Confirm the Netlify application URI under **Settings > Application URIs**.
You can now customize and modify this application similar to any other application in your Auth0 Dashboard.
You should now see your client application and API in your Auth0 dashboard under **Applications**.
## Set up the integration
When integrating Auth0 with your Netlify project, you'll need to provide your application with authentication settings such as the **Client ID** and **Auth0 domain**.
If your application is reading these settings from environment variables, they are injected automatically by extension.
1. Go to your Netlify dashboard.
2. Navigate to **Site configuration > Environment variables.**
3. Click **Add a variable**, and enter:
* `AUTH0_CLIENT_ID` (your Auth0 Client ID)
* `AUTH0_DOMAIN` (your Auth0 domain)
These variables, along with all other application information, can be found in your Auth0 dashboard under **Applications > \[Your app] > Settings**.
You should now have the proper Auth0 credentials set up for deployment.
### Populate a configuration file
If your application reads Auth0 settings from a file, you can automate this process during the build phase. This ensures your application always has the proper authorization without manually modifying files.
To do this:
1. Go to your Netlify dashboard.
2. Navigate to **Site configuration > Build & deploy > Build settings**.
3. Modify the **Build command** to include a shell script before starting the build:
```bash wrap lines theme={null}
echo "{\"clientId\": \"${AUTH0_CLIENT_ID}\", \"domain\": \"${AUTH0_DOMAIN}\"}" > auth_config.json && npm run build
```
This script creates a JSON file named `auth_config.json`, and populates it with the environment variables `AUTH0_CLIENT_ID` and `AUTH0_DOMAIN` set above, ensuring the application has correct Auth0 settings at runtime.
## Manage integration
After adding the Auth0 integration to your Netlify project, the Auth0 Dashboard creates a new Application to manage and customize your CIAM workflow.
1. Navigate to the Auth0 Dashboard.
2. Select **Applications > Applications > \[Your Netlify application]**
3. Confirm the Netlify application URI under **Settings > Application URIs**.
You can now customize and modify this application similar to any other application in your Auth0 Dashboard.